May 2018 Newsletter
Using Time Machine to backup your data
Backing up your Mac is like flossing your teeth: everyone knows they should do it every night, but too many people never get around to it. Unlike flossing, once you set up backups, they don’t require daily attention. And turning on Apple’s Time Machine backup feature is easy—simply open System Preferences > Time Machine, click Select Backup Disk, and pick a hard drive to hold your backups.

Ah, but there’s the rub. If you don’t have an appropriate hard drive, you need to get one, and there are tons of options. Here’s our rundown of what to look for, with recommendations.
How Much Space Do You Need?
The first question when looking for a backup drive is how much data it needs to hold. You could put a lot of effort into figuring this out, but for most people, the answer simple. Buy the largest drive you can reasonably afford, as long as it will hold at least two to three times as much data as you have or anticipate creating in the near future.
Say you use a MacBook Pro with a 512 GB SSD. You could get by with a 1 TB backup drive, which would be twice as large as your internal drive. But if a 1 TB drive costs $100 and a 2 TB drive costs $130, it’s worth the extra $30 to double the available space.
How Will You Connect It to Your Mac?
With external hard drives, you need to match the ports on your Mac with the ports on the drive. That might sound tricky, what with USB 3, FireWire, USB-C, and Thunderbolt. Luckily, for most people, the right choice is simple: a drive that supports USB 3. They’re inexpensive and plenty fast for backups.
Nearly every Mac sold since 2012 supports USB 3, either via the familiar USB-A port or the newer USB-C/Thunderbolt 3 port. If your Mac has only USB-C ports—as would be the case if you have either a MacBook or a recent MacBook Pro—you may also need an adapter cable that’s USB-A on one end and USB-C on the other.
What Type of Drive Should You Buy?
Inside the case, an external hard drive contains either a 2.5-inch or 3.5-inch drive mechanism.
- 2.5-inch drives are smaller, more portable, and usually bus-powered, meaning they get power from your computer instead of from a wall outlet, which makes them easier to hook up and use. They’re also designed to be more rugged. On the downside, they cost more per gigabyte, max out at 5 TB in size, and are often slower.
- 3.5-inch drives usually need to be plugged into power, and they’re less appropriate to carry around. However, they cost less per gigabyte and can be bought easily in sizes up to 8 TB. Plus, they tend to support more connection types, making them more flexible.
If you work mostly on a notebook Mac and lead a mobile lifestyle, carrying a bus-powered 2.5-inch drive ensures you can back up while traveling. Such a drive might also be best for a MacBook-equipped college student. In fact, 2.5-inch drives have gotten so inexpensive that we recommend them for everyone unless you simply need more storage—more than 5 TB—than a 2.5-inch drive holds.
Putting It All Together
Since the hard drive mechanisms are made by a relatively small number of companies, the differences between external drives mostly come down to the price, industrial design, and extra ports. We’ve generally had good luck with
2.5-inch drives from Western Digital, so that's what we use at MacAtoZ and what we recommend.
Finally, remember that Time Machine drives get a lot of use. They're backing up files every hour and they typically store hundreds of thousands of files. Our experience has been that this means that they don't last as long as internal hard drives or SSDs. We commonly replace Time Machine drives every 3-5 years.
Regardless any of the choices you might make, the crucial bit is to make sure you have your data backed up!
Tips for working with Trash on the Mac
One of the great innovations of the Mac, way back when, was the concept of the Trash. Instead of deleting files immediately, you’d put them in the Trash, where they’d sit until you either took them out or removed them for good by emptying the Trash. You undoubtedly know the basics of working with the Trash: drag files in, drag mistakenly trashed files out, and choose Finder > Empty Trash to delete the files and recover the disk space.
But instead of just dragging files to and from the Trash, you can take advantage of a few special techniques that make working with the Trash faster and easier.
Move Files to the Trash
The most obvious method of trashing a file is to drop it on the Trash icon in the Dock, but on a large screen that can be fussy. Once you’ve selected one or more files in the Finder, try one of these alternatives:
- Press Command-Delete. (This is our favorite!)
- Control- or right-click on one of them, and choose Move to Trash.
- Choose File > Move to Trash.
What if you want to live dangerously and delete a file immediately, perhaps because you need to recover the disk space right away? Hold down Option and choose File > Delete Immediately, or press Command-Option-Delete. The Finder always asks whether you want to do this.
 Remove Files from the Trash
We all make mistakes and trash files by accident, or sometimes realize later that a file we put in the Trash is still needed. Taking something out is easy: click the Trash icon on the Dock to open its window, and then drag the file out of the window. But, there is more to know about the best ways to remove files from the Trash.
First, if you trash a file and immediately realize it was the wrong thing to do, press Command-Z or choose Edit > Undo Move to Trash to put it back where it started
We like viewing the Trash window in Cover Flow view (open it, and then choose View > as Cover Flow) because of the document preview at the top of the window. We also like to sort by Date Added so that we can see the items we’ve trashed most recently (if the Date Added column isn’t showing, choose View > Show View Options and select the Date Added checkbox).

In the Trash window, you can select an item and use the Put Back command to return it to its original location. Try one of these techniques:
- Press Command-Delete. It’s the same shortcut as for Move to Trash, but does the reverse when the selection is in the Trash window.
- Control- or right-click on one of them, and choose Put Back.
- Choose File > Put Back.
Empty the Trash
The main reason to empty the Trash is if you need to reclaim the disk space its contents occupy. You can do that at any time, as we’ll explain momentarily, but in macOS 10.12 Sierra and later, you can have the Mac automatically remove items from the Trash after they’ve been in there for 30 days. Just choose Finder > Preferences > Advanced, and select the “Remove items from the Trash after 30 days” checkbox.
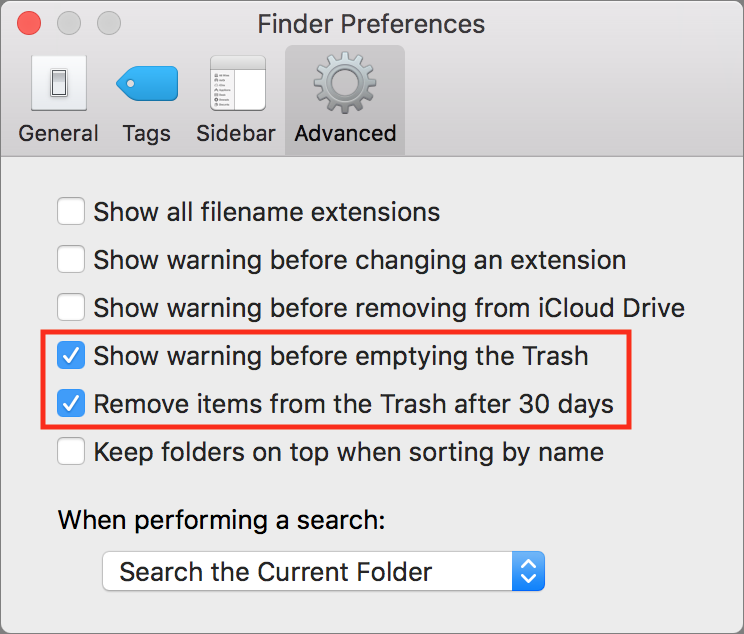
To empty the Trash manually, choose Finder > Empty Trash. If “Show warning before emptying the Trash” is selected in the window shown above, you’ll be prompted to confirm the deletion. If you don’t like the prompt, deselect that checkbox. Other shortcuts include:
- Click and hold the Trash icon on the Dock, and choose Empty Trash.
- Press Command-Shift-Delete.
- To avoid the warning even when it’s enabled, press Command-Shift-Option-Delete.
Emptying the Trash doesn’t have to be an all or nothing action. Imagine that you’ve just trashed a few huge files and want to recover their disk space without tossing every other file in the Trash. Just select them, Control- or right-click one, and choose Delete Immediately. You can also press Command-Option-Delete.

Files in your Mac’s Trash smell better than the inside of a typical garbage can, but that doesn’t mean you want to spend a lot of time fussing with them. With these tips, you can trash files, recover from mistakes, and clear disk space quickly and confidently.
The MacAtoZ blog
I don't want to toot our own horn too much (toot! toot!) but we are crushing it on the web site blog. If you haven't checked it out—and who can blame you? Life gets busy—I encourage you to do so. Like this spiffy newsletter, it's filled with free and helpful Apple-related tips. See www.macatoz.com/news for all the latest!
Tip of the day: Teach Siri how to pronounce names properly
Siri is supposed to be a competent voice assistant, but sometimes Siri can’t even pronounce your own name correctly!
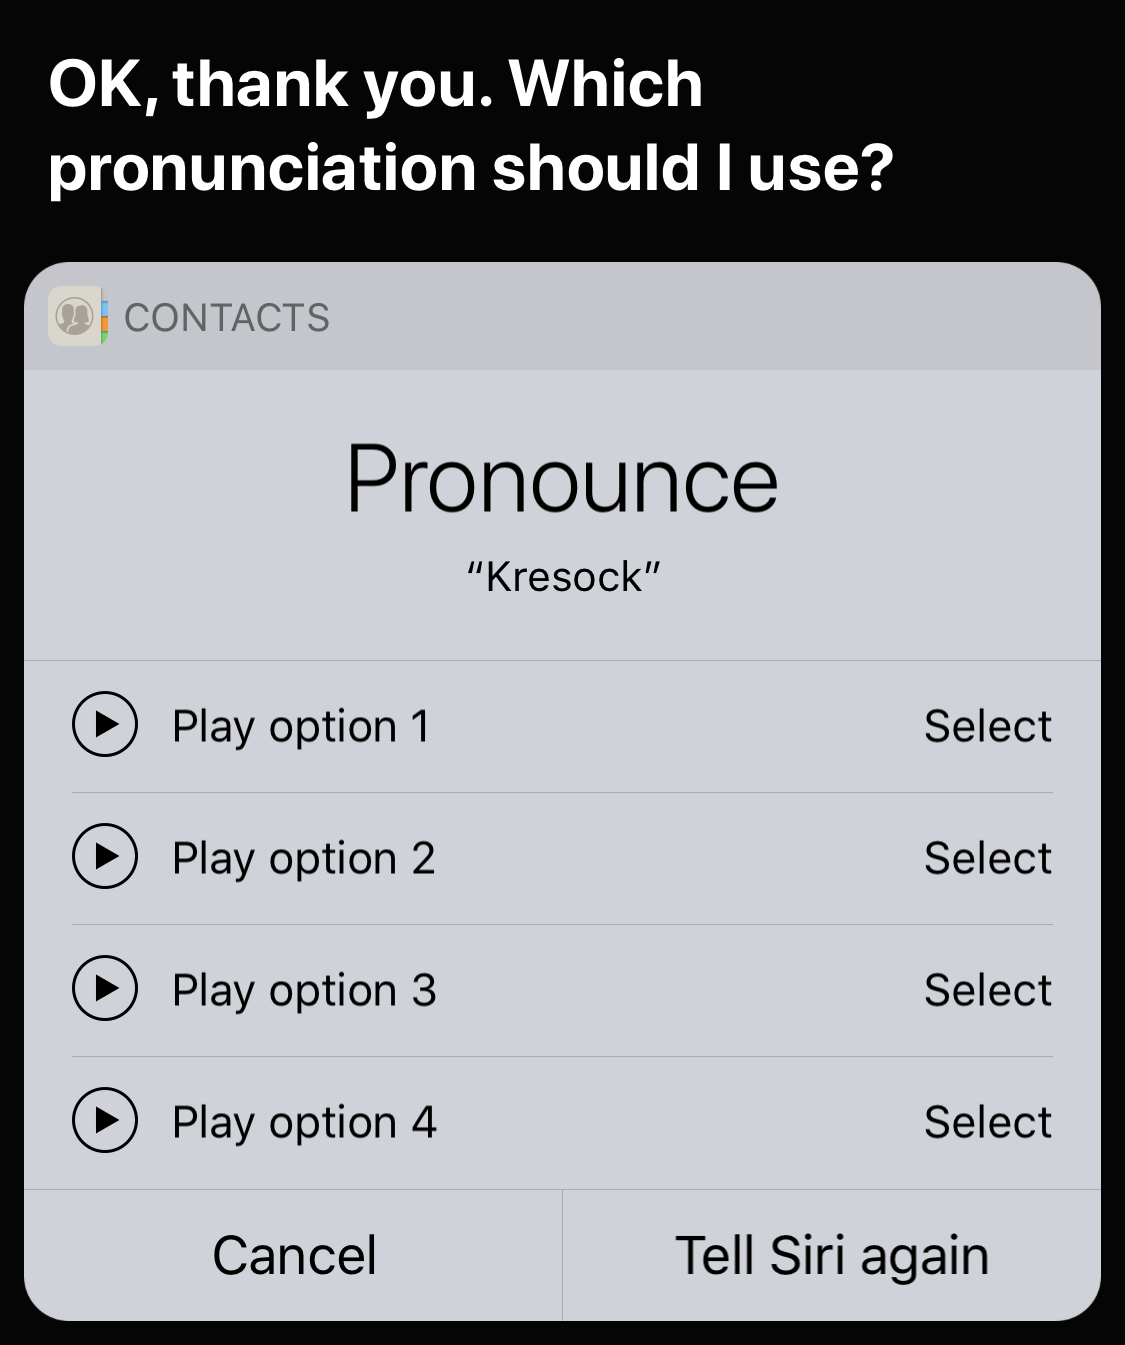
Luckily, it’s easy to fix Siri’s pronunciation for any name. Just say to Siri, “Learn how to pronounce Jill Kresock.” (Siri defaults to “krehsock” rather than the correct “kreesock” in this case.) Siri first asks you to say the person’s first name and then presents a list of options for the best pronunciation. Tap the play button next to each option to hear it, and tap Select for the one you like best. If none are good, tap Tell Siri Again and say the name again, perhaps changing your enunciation slightly. Once you’ve set up the first name, Siri will ask you to say the person’s last name, after which you can pick the best pronunciation for the last name.
 .
.


